I'm wondering if there are any of you guys that have found the Holy Grail of stock finishing protocols. I have used BLO, Tru Oil, Linspeed and lately "Tried and True" varnish for my rifle projects. They have all worked OK and in a few cases better than OK. I've done the library and internet searches and came up with many ways to achieve a fine stock finish-but not all would be good in the field (waterproofing and hand proofing).
Here is the point of my post: There is something I read in the 80s about filling the grain of walnut that is haunting me. I cannot remember the details but my recollection was that you need to fill pores with a CLEAR finish (oil, shellac, varnish) to really give the wood grain DEPTH and a wondrous shine. It seems most of the current recommendations indicate wet sanding a slurry of wood and oil (or whatever) into the pores for a fill. I'm not sure the two methods are complimentary - putting a slurry of wood dust in the pores seems to me to be a dark cloud of STUFF that would not be a deep reflecting light kind of situation. Any ideas?
Claro walnut finishing process
Forum rules
Welcome to the Leverguns.Com General Discussions Forum. This is a high-class place so act respectable. We discuss most anything here other than politics... politely.
Please post political post in the new Politics forum.
Welcome to the Leverguns.Com General Discussions Forum. This is a high-class place so act respectable. We discuss most anything here other than politics... politely.
Please post political post in the new Politics forum.
-
twoguns
- Levergunner 1.0
- Posts: 57
- Joined: Mon Jan 18, 2010 12:45 pm
- Location: Pagosa Springs, CO
- Contact:
Claro walnut finishing process
A man on a gallopin' horse in the middle of the night would never know the difference.
-
AJMD429

- Posting leader...
- Posts: 32212
- Joined: Sun Sep 09, 2007 10:03 am
- Location: Hoosierland
- Contact:
Re: Claro walnut finishing process
Someone here will remember the term for it ("spalding"...?), but there is a term for nearly-dry-rotted wood preservation that basically involves embedding it into/with acrylic or something similar. The reason folks do it is the 'rot' lines and colors can be beautiful, but of course the wood has begun to lose strength at that point. With proper treatment, such wood can be used for knife handles, handgun grips, and I think even rifle stocks.
Perhaps that technique could be used on normal wood, as well.
I've thought about trying that method on the ordinarily-wimpy wood, multi-hued, and beautiful, that comes from the vine we call poison ivy. I've used ivy grips that were coated with many poly-urethane coats, but the acrylic seems clearer and tougher.
Doctors for Sensible Gun Laws
"first do no harm" - gun control LAWS lead to far more deaths than 'easy access' ever could.
Want REAL change? . . . . . "Boortz/Nugent in 2012 . . . ! "
"first do no harm" - gun control LAWS lead to far more deaths than 'easy access' ever could.
Want REAL change? . . . . . "Boortz/Nugent in 2012 . . . ! "
-
kimwcook
- Advanced Levergunner
- Posts: 7978
- Joined: Tue Sep 04, 2007 10:01 pm
- Location: Soap Lake, WA., U.S.A.
Re: Claro walnut finishing process
Doc, spalted (close to your spalding) is a name for molded or rotting wood that gives the wood a neat pattern.
If I remember right I recall something like rottenstone used to finish a stock/fill in the pores. I'm getting old, what do I know.
If I remember right I recall something like rottenstone used to finish a stock/fill in the pores. I'm getting old, what do I know.
Old Law Dawg
Re: Claro walnut finishing process
The Pilkington "clear" does what you ask using the sanding process.
A little trick I learned is to wipe the wood down before each oil application, with Armorall. Some sort of chemical process occurs and the Armorall acts like a catalyst. The oil coat is usually dry within 30 minutes.
http://www.midwayusa.com/viewproduct/?p ... ber=384884
**
A little trick I learned is to wipe the wood down before each oil application, with Armorall. Some sort of chemical process occurs and the Armorall acts like a catalyst. The oil coat is usually dry within 30 minutes.
http://www.midwayusa.com/viewproduct/?p ... ber=384884
**
I know a whole lot about very little and nothing about a whole lot.
-
AJMD429
- Posting leader...
- Posts: 32212
- Joined: Sun Sep 09, 2007 10:03 am
- Location: Hoosierland
- Contact:
Re: Claro walnut finishing process
Thanks for explaining what I meant to say. . .kimwcook wrote:Doc, spalted (close to your spalding) is a name for molded or rotting wood that gives the wood a neat pattern.
Here's some info I found when I used the proper term...both articles comment on 'hardening' and filling the wood with clear fillers, epoxies or acrylics, it looks like. The Vedder Mountain Hardwoods article lists eight or nine specific products used to fill and harden but show the underlying figure and color through very clear material. The StabilizedWood article deals more with warpage issues, and the WoodTurningLearn article with prevention of color fade and loss of brightness.
I've not used any of this stuff myself, but thought I'd pass along the information.
http://www.veddermountainhardwoods.com/ ... lted-wood/
http://www.stabilizedwood.com/info.shtml
http://www.woodturninglearn.net/article ... edwood.htm
Doctors for Sensible Gun Laws
"first do no harm" - gun control LAWS lead to far more deaths than 'easy access' ever could.
Want REAL change? . . . . . "Boortz/Nugent in 2012 . . . ! "
"first do no harm" - gun control LAWS lead to far more deaths than 'easy access' ever could.
Want REAL change? . . . . . "Boortz/Nugent in 2012 . . . ! "

Re: Claro walnut finishing process
I use pure Tung oil to finish a couple of walnut stocks I had bought for my Mausers. Do not cut or mix anything to the tung oil, just put it on and keep working it till the wood absorbs it and it is tacky. Then let dry. In my case I'm in the northeast and it would take 1-2 days to fully dry. Then steel wool and coat again, took me about 8-10 coats, but the result is stunning.
Steve
Steve
Re: Claro walnut finishing process
I use Tru-oil. I sand the wood down to 400 grit, then whisker. Rub in Tru-oil (1 or 2 drops per side) with the palm of your hand until it gets hot and dry. Lighten the pressure but keep rubbing until all the gooey stuff is gone and the stock shines. Let dry overnight and sand with 400 back down to wood. Keep repeating until the pores are filled. You'll know when they are filled if you look at it under light and don't see any shiny dimples. When the pores are filled, continue the process but skip the sanding between coats. I use 2 or 3 coats without sanding to give it a little built up finish. The last couple of coats only use one drop of finish per side of stock.
" I never went to college, but I sure paid for my education."
A favorite quote from my Grandfather.
A favorite quote from my Grandfather.
-
marlinman93
- Advanced Levergunner
- Posts: 6490
- Joined: Sun Apr 01, 2007 3:40 pm
- Location: Oregon
Re: Claro walnut finishing process
All I use any more is Wipe On Poly, by Minn Wax. I used to exclusively use Laurel Mountian Permalyn Sealer, and it was fantastic, but WOP is the same product at a much cheaper price, and easier to find!
It will give you the look of a hand rubbed oil finish without the time, and also much better protection from the elements. It also will not chip or crack like many polyurethane based finishes, and because of it's extremely thin nature it applies like water and soaks deep into the wood's pores.
I've used it on numerous guns, wet sanding it in as I build up coats. Usually takes about 8 coats to get a oil type finish, but I sometimes go 12 or more on really nice wood to get that deep satin oil finish.
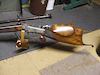
This is WOP on a Roller and a Hepbrun I stocked:


It will give you the look of a hand rubbed oil finish without the time, and also much better protection from the elements. It also will not chip or crack like many polyurethane based finishes, and because of it's extremely thin nature it applies like water and soaks deep into the wood's pores.
I've used it on numerous guns, wet sanding it in as I build up coats. Usually takes about 8 coats to get a oil type finish, but I sometimes go 12 or more on really nice wood to get that deep satin oil finish.
This is WOP on a Roller and a Hepbrun I stocked:
Pre WWI Marlins and Singleshot rifles!
http://members.tripod.com/~OregonArmsCollectors/
http://members.tripod.com/~OregonArmsCollectors/
Re: Claro walnut finishing process
I'm a Waterlox fan. Refinishing, if ever need be can be done without stripping.
Kind regards,
Tycer
----------------------------------------------------------------
http://www.saf.org - https://peakprosperity.com/ - http://www.guntalk.com
Tycer
----------------------------------------------------------------
http://www.saf.org - https://peakprosperity.com/ - http://www.guntalk.com
Re: Claro walnut finishing process
Twoguns,many years ago I refinished an old Winchester .22 stock like you are asking about.Following the old directions I sanded until I reached my final stock shape.I then wet the wood ,placed a towel on the wood and applied an old iron in order to raise the "whiskers" in the wood.I then took 0000 steel wool and removed the whiskers and polished the wood.I did this at least 4 times using the steel wool to remove only the raised whiskers.Be careful not to cut below the whisker line as you will expose more whiskers to swell in the finish.
I then had a stock as slick as a babies back side with a fair amount of small elongated pits.I took a high quality marine spar varnish and rubbed it into the wood only trying to fill the pits with clear varnish.I let this dry for a while and then using the steel wool again polished lightly the wood surface leaving the pits only with finish in them.I did this several times( this was a long time process!!!!!) until the pits were completely filled level with the wood surface.At this time the stock felt extremely slick and smooth.
I then began applying the hand rubbed finish a very thin coat at a time.Don't use the same steel wool each time but change it out so as to always have a soft material to polish with.I used tru-oil back then and applied 10 coats! When I finished the wood finish had a depth to it that I don't see anymore.
"Knowledge without understanding is a dangerous thing. For a little knowledge entices us to walk its path, a bit more provides the foundation on which we take our stand, and a sufficient amount can erect a wall of knowledge around us, trapping us in our own ignorance."
-
marlinman93
- Advanced Levergunner
- Posts: 6490
- Joined: Sun Apr 01, 2007 3:40 pm
- Location: Oregon
Re: Claro walnut finishing process
By wet sanding the wood with the finish applied the sanding dust fills in the pores and makes a surface that is flawless.
Pre WWI Marlins and Singleshot rifles!
http://members.tripod.com/~OregonArmsCollectors/
http://members.tripod.com/~OregonArmsCollectors/
-
twoguns
- Levergunner 1.0
- Posts: 57
- Joined: Mon Jan 18, 2010 12:45 pm
- Location: Pagosa Springs, CO
- Contact:
Re: Claro walnut finishing process
marlinman93 wrote:the sanding dust fills in the pores and makes a surface that is flawless.
Folks I really appreciate all of you guys posting your go-to finish. The point I was trying to make is NOT filling the pores with opaque sanding-dust-slurry and oil, but filling it with just an oil leaving the pores deep and reflective instead of dark spots in the finish. I have done this sanding in treatment and while it will give you a perfect finish with filled up pores and with no grain showing - I think it looks a wee bit flat compared to just oil in the pores.
A man on a gallopin' horse in the middle of the night would never know the difference.
-
twoguns
- Levergunner 1.0
- Posts: 57
- Joined: Mon Jan 18, 2010 12:45 pm
- Location: Pagosa Springs, CO
- Contact:
Re: Claro walnut finishing process
milton, that is what I'm looking formilton wrote:the wood finish had a depth to it that I don't see anymore.
A man on a gallopin' horse in the middle of the night would never know the difference.
Re: Claro walnut finishing process
You won't be disappointed with a pure Tung oil finish. It really brings out the grain as well as gives a look that it is lacquered, but is not. It is totally weather proof and if needed more Tung can be applied especially if you get some scratches or other damage (try doing that with a poly type product). It is a lot of work to get the deep finish many, many coats, and I like to use a little high quality wood wax at the end. Maybe I can gets some pics up later.twoguns wrote:milton, that is what I'm looking formilton wrote:the wood finish had a depth to it that I don't see anymore.
Steve
Re: Claro walnut finishing process
I like grain too.
Waterlox on mesquite:

Waterlox on mesquite:
Kind regards,
Tycer
----------------------------------------------------------------
http://www.saf.org - https://peakprosperity.com/ - http://www.guntalk.com
Tycer
----------------------------------------------------------------
http://www.saf.org - https://peakprosperity.com/ - http://www.guntalk.com
-
AJMD429
- Posting leader...
- Posts: 32212
- Joined: Sun Sep 09, 2007 10:03 am
- Location: Hoosierland
- Contact:
Re: Claro walnut finishing process
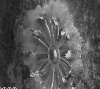
I agree, and know what you mean. Kind of like those "tiger-eye" jewelry stones [attachment=0]tiger eye tmp.jpg[/attachment]If you can see a bit INTO the grain, it really looks cool.twoguns wrote:The point I was trying to make is NOT filling the pores with opaque sanding-dust-slurry and oil, but filling it with just an oil leaving the pores deep and reflective instead of dark spots in the finish. I have done this sanding in treatment and while it will give you a perfect finish with filled up pores and with no grain showing - I think it looks a wee bit flat compared to just oil in the pores.
Now that there is a cool-looking firearm, regardless of the wood-finish...
You do not have the required permissions to view the files attached to this post.
Doctors for Sensible Gun Laws
"first do no harm" - gun control LAWS lead to far more deaths than 'easy access' ever could.
Want REAL change? . . . . . "Boortz/Nugent in 2012 . . . ! "
"first do no harm" - gun control LAWS lead to far more deaths than 'easy access' ever could.
Want REAL change? . . . . . "Boortz/Nugent in 2012 . . . ! "
-
marlinman93
- Advanced Levergunner
- Posts: 6490
- Joined: Sun Apr 01, 2007 3:40 pm
- Location: Oregon
Re: Claro walnut finishing process
Sanding residue will not be darker than the surrounding wood, as it's the same material. I never see any signs of darker pores when I'm finished with a stock. What I also don't see is any signs of pores period. A lot of freshly finished gun stocks look great, but under close examination you can see the tiny remains of pores that still remain.
A heavy finish can fill those pores with clear, but it will also create a finish that is brittle, and often too shiny. It wont hold up toweather, and will often scratch or chip easily, and get milky once moisture finds it's way underneath.
Good quality wood, with proper wet sanding wont look any different than the bare wood, except that it will be smoother, and have no open pores for the inclement weather to enter.
Pre WWI Marlins and Singleshot rifles!
http://members.tripod.com/~OregonArmsCollectors/
http://members.tripod.com/~OregonArmsCollectors/
-
twoguns
- Levergunner 1.0
- Posts: 57
- Joined: Mon Jan 18, 2010 12:45 pm
- Location: Pagosa Springs, CO
- Contact:
Re: Claro walnut finishing process
marlinman93,
You are probably spot-on for that kind of finish. It takes less time to filkl pores and gives a perfect flat surface for finishing. However there is that thing banging around in the back of my mind about opaque fillers whether silica or sanding slurry. I remember those being compared to looking at a fine cut diamond, and the light path from sun/light source to the pore bottom and back to our eyes. I could be hosed, but I remember something from a famous stock finisher expounding on this in the 70s. Wondering if the Tiger Eye stone is a good analogy?
You are probably spot-on for that kind of finish. It takes less time to filkl pores and gives a perfect flat surface for finishing. However there is that thing banging around in the back of my mind about opaque fillers whether silica or sanding slurry. I remember those being compared to looking at a fine cut diamond, and the light path from sun/light source to the pore bottom and back to our eyes. I could be hosed, but I remember something from a famous stock finisher expounding on this in the 70s. Wondering if the Tiger Eye stone is a good analogy?
A man on a gallopin' horse in the middle of the night would never know the difference.