
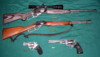
A couple weeks ago I posted a couple pictures of a rusted up .30-30 Marlin. (https://www.levergunscommunity.org/view ... 3da3dc2fad)
Last week I bought it from the lady who had it. She was selling her late brother's estate. I bought it home and looked it over. It had not gotten any better!
I took it apart and soaked it in penetrating oil and left it. When I was taking it apart I had to use our small battery powered hammer drill to break a couple screws loose .. but I got them all removed without snapping any off.
After it had soaked in the penetrating oil I started removing the rust with bronze wool. The built up rust came off fairly easily but the barrel especially was pitted fairly deeply in places. What was interesting is that I found no rust on the interior .. in the action or the bore. I used the bronze wool until it was obviously not effective so I switched to 220 grit sandpaper. I used oil and the sandpaper to polish the barrel and receiver.
There were quite a few pitted places on the barrel and the receiver had dark marks where the rust was heaviest.
I am now down to where the majority of the pits have been removed. I am starting to polish it further and I will post new photos as I get the work done.
UPDATE 7/16
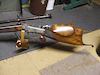
I decided to go with the Trapper length barrel and shortened both it and the magazine tube today.
I used a barrel jig to keep the cut straight and square. This jig can also be used to cut a front sight dovetail.
I used a 32 teeth to the inch blade and cut slow. It took maybe 10 minutes. A little file work .. some polishing .. 45 degree reamer on the muzzle and it was done.
I am cleaning up the small parts and the screws .. removing all finish that was on them. I will begin slicking up the action according to Mic McPherson's book. And I am waiting on a different stock and fore end that I will fit. I think I will leave the gun in the white for a bit .. shoot it some and see how I like it before I put a finish on it.
Maybe.
UPDATE 7/18
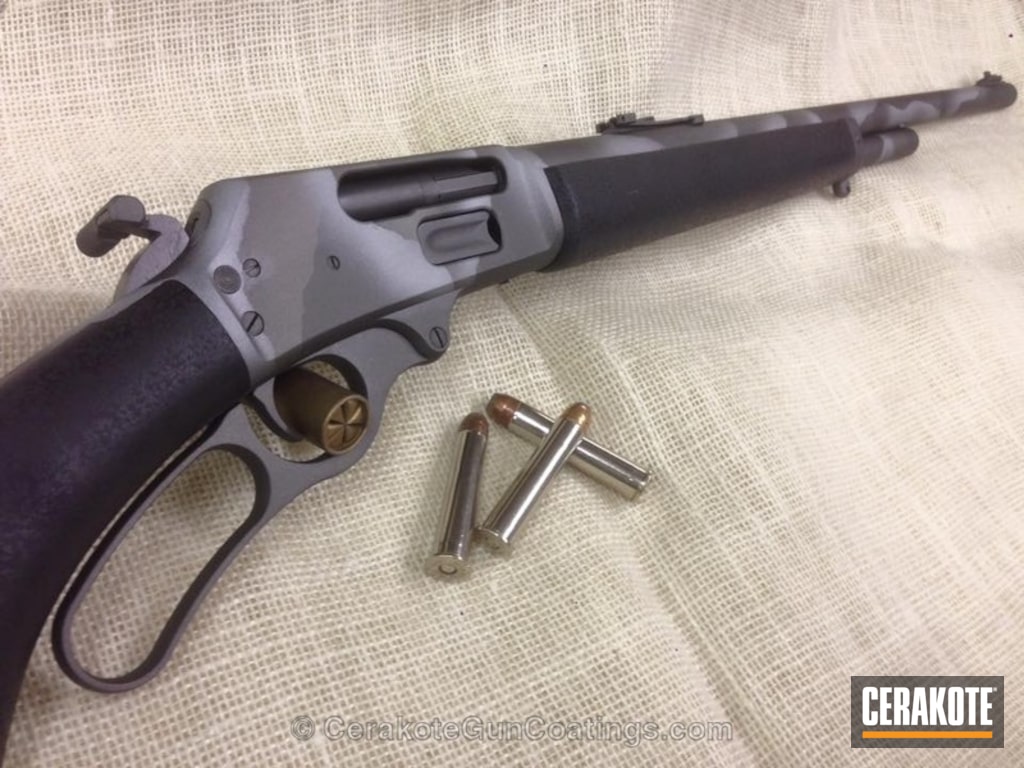
Decided to give it a "distressed finish" ... (otherwise known as "crappy" finish) .. hoping to make it look older and used ..
UPDATE 07/23
Getting close to taking it to the range! Waiting on the scope so I can mount it and bore sight it.
My goal eventually became to make it look like an older gun .. used but not abused. I think I got close to that.
UPDATE 7/24
Mounted the scope last night and bore-sighted it with a laser bore-sighter. At the range this morning I put about 120 rounds through it .. testing functionality .. seeing what would come loose ... and getting the scope close to where I wanted it. I shot loads with the Speer 130 gr. and 170 gr. bullets. Point of Impact was quite different between the light and heavy bullet. Changing powders also changed things quite dramatically.
BEST GROUP OF THE DAY
Using the same bullet but switching to H322 the Point of Impact was the Point of Aim .. centered on the black. Another powder hit about 2 1/2" low.
Had a few minor issues that cropped up ... which is why I was shooting it. I will get those taken care of. It really does show promise.
Restoration/Repair/Renewal in Progress -UPDATE 07/24
Forum rules
Welcome to the Leverguns.Com General Discussions Forum. This is a high-class place so act respectable. We discuss most anything here other than politics... politely.
Please post political post in the new Politics forum.
Welcome to the Leverguns.Com General Discussions Forum. This is a high-class place so act respectable. We discuss most anything here other than politics... politely.
Please post political post in the new Politics forum.
Restoration/Repair/Renewal in Progress -UPDATE 07/24
You do not have the required permissions to view the files attached to this post.
Last edited by JimT on Fri Jul 24, 2020 12:22 pm, edited 4 times in total.
Re: Restoration/Repair/Renewal in Progress
Good for you bringing it back.
Seriously, it wasn't some really special collector's item before.
Clean it up, it fits my definition of a 'truck gun'.
I would consider cerrokoting it, or some similar finish - send it out or do it myself.
Awaiting more pictures.
Seriously, it wasn't some really special collector's item before.
Clean it up, it fits my definition of a 'truck gun'.
I would consider cerrokoting it, or some similar finish - send it out or do it myself.
Awaiting more pictures.
-
AJMD429
- Posting leader...
- Posts: 32276
- Joined: Sun Sep 09, 2007 10:03 am
- Location: Hoosierland
- Contact:
Re: Restoration/Repair/Renewal in Progress
Yeah; I’ve seen some photos were guys took guns like this that weren’t going to be collectibles anymore, and did a real nice job Cerakoting them in muted woodsy colors or Parkerizing. A couple did camouflage. It seems like it would probably be easier to keep the finish like that from rusting again versus metal that’s never had any rust started.
Doctors for Sensible Gun Laws
"first do no harm" - gun control LAWS lead to far more deaths than 'easy access' ever could.
Want REAL change? . . . . . "Boortz/Nugent in 2012 . . . ! "
"first do no harm" - gun control LAWS lead to far more deaths than 'easy access' ever could.
Want REAL change? . . . . . "Boortz/Nugent in 2012 . . . ! "
-
M. M. Wright
- Advanced Levergunner
- Posts: 4296
- Joined: Wed Sep 15, 2010 12:57 pm
- Location: Vinita, I.T.
Re: Restoration/Repair/Renewal in Progress
Jim, I just finished rust bluing a Colt I've had for sometime. Used Brownell's rust blue formula and mostly followed their directions. The biggest hurdle is getting it clean and I am blessed to have Zep caustic soda chemical to boil all the oil off. It's not expensive and the results are pretty nice. And you purists needn't worry, it was a 2nd gen commemorative that I sanded the "Gold" from. (Titanium Nitride is what they really used) I've had good results from degreasing with Ether, starting fluid. If you use well water you might want to buy bottled water to boil your rusted parts in. The chemical causes the parts to form red oxide which changes to black oxide when boiled. All you do then is card the parts with 0000 steel wool. This is the method of bluing for double guns of the highest quality.
M. M. Wright, Sheriff, Green county Arkansas (1860)
Currently living my eternal life.
NRA Life
SASS
ITSASS
Currently living my eternal life.
NRA Life
SASS
ITSASS
-
marlinman93
- Advanced Levergunner
- Posts: 6500
- Joined: Sun Apr 01, 2007 3:40 pm
- Location: Oregon
Re: Restoration/Repair/Renewal in Progress
A trick I use for polishing barrels is to cut schedule 40 PVC in half and use sandpaper inside the half to polish round barrels. I use the sandpaper sold for automotive block sanders that has an adhesive back, so it's easy to stick inside the PVC. But I only remove the paper on the back at each end, so it also doesn't stick too well, and make it hard to replace.
I cut the PVC tube in various lengths based on what the need is, but never less than about 6" long, and on long 30" barrels I use 12" lengths.
It makes the polishing job much easier, and leaves a bare metal finish much like the factory did. Marlin polished their barrels lengthwise originally. I've seen people polish them in a lathe with emery paper, and the result isn't good, and obvious what they did.
Pre WWI Marlins and Singleshot rifles!
http://members.tripod.com/~OregonArmsCollectors/
http://members.tripod.com/~OregonArmsCollectors/
Re: Restoration/Repair/Renewal in Progress
Emery paper is WAY too rough for that kind of activity.I've seen people polish them in a lathe with emery paper, and the result isn't good, and obvious what they did.
I've finished literally MILES of wood and metal tubing on a lathe over the course of my life, and
very, very good results indeed can be achieved. Of course, your rolled lettering is probably going to suffer
to some degree, and extreme care needs to exercised around dovetail sight cuts and the like.
Also, protect the lathe bed with cloths - silicon carbide is hard on lathe beds. But progressively finer
grades of silicon carbide paper lubricated with light oil or kerosene yields a finish ready for final
polishing. (On wood, obviously, no lubricant is needed.) In either case, final sanding and polishing
is done lengthwise. Care needs to be exercised on the buffing wheel, too. It's very easy to round
off the sharp edges of dovetail cuts and rolled lettering.
I do have an H&R Handi-Rifle where the barrel was factory finished on a lathe with a fairly rough abrasive.
Bluing is okay, but I can literally file my nails on the barrel lengthwise!
I'm glad the bore is okay on your rifle, Jim. If you get it finished nice and smooth - say 800 grit, you'll have
a nice choice of finishes, providing that you don't have many pits. Even a traditional brown finish - something
old-fashioned and different on a levergun. I like bluing, though - just my 2 cents. Send that receiver, the trigger,
hammer, and barrel bands out for color case hardening, blue the rest, and you'll have a handsome gun! (You'll probably
be broke, too!
-Stretch
Re: Restoration/Repair/Renewal in Progress
Glad to see a neglected gun fixed up.
D. Brian Casady
Quid Llatine Dictum Sit, Altum Viditur.
Advanced is being able to do the basics while your leg is on fire---Bill Jeans
Don't ever take a fence down until you know why it was put up---Robert Frost
Quid Llatine Dictum Sit, Altum Viditur.
Advanced is being able to do the basics while your leg is on fire---Bill Jeans
Don't ever take a fence down until you know why it was put up---Robert Frost
-
marlinman93
- Advanced Levergunner
- Posts: 6500
- Joined: Sun Apr 01, 2007 3:40 pm
- Location: Oregon
Re: Restoration/Repair/Renewal in Progress
You do realize emery paper comes in different grits? To say it's too aggressive is a blanket statement, that really doesn't apply to every grit. I've got emery paper up to 500 grit. The issue is the width of emery paper, and how it's narrow width can leave signs of it being turned on a lathe.
I can polish down barrels to 1000 or 1500 grit, and use sheet sandpaper on the lathe, and it wont show lathe turning. But polishing them lengthwise by hand using the PVC gets the job done faster, and uses less paper, or time for me. And the finish looks more traditional.
And as you mentioned, it's impossible to avoid rollstamps when finishing in a lathe. Another reason I much prefer hand polishing.
Pre WWI Marlins and Singleshot rifles!
http://members.tripod.com/~OregonArmsCollectors/
http://members.tripod.com/~OregonArmsCollectors/
Re: Restoration/Repair/Renewal in Progress -UPDATE 7/16
I haven't needed to refinish a barrel that way, but i am glad to know how you guys do it. Filed away for future use.
D. Brian Casady
Quid Llatine Dictum Sit, Altum Viditur.
Advanced is being able to do the basics while your leg is on fire---Bill Jeans
Don't ever take a fence down until you know why it was put up---Robert Frost
Quid Llatine Dictum Sit, Altum Viditur.
Advanced is being able to do the basics while your leg is on fire---Bill Jeans
Don't ever take a fence down until you know why it was put up---Robert Frost
Re: Restoration/Repair/Renewal in Progress -UPDATE 7/16
Nice pun.Filed away for future use.
Hope it doesn't rub folks the wrong way......
-Stretch
Re: Restoration/Repair/Renewal in Progress -UPDATE 7/16
Helps keep me from being blue.
D. Brian Casady
Quid Llatine Dictum Sit, Altum Viditur.
Advanced is being able to do the basics while your leg is on fire---Bill Jeans
Don't ever take a fence down until you know why it was put up---Robert Frost
Quid Llatine Dictum Sit, Altum Viditur.
Advanced is being able to do the basics while your leg is on fire---Bill Jeans
Don't ever take a fence down until you know why it was put up---Robert Frost
-
marlinman93
- Advanced Levergunner
- Posts: 6500
- Joined: Sun Apr 01, 2007 3:40 pm
- Location: Oregon
Re: Restoration/Repair/Renewal in Progress -UPDATE 7/16
For octagon barrels I use the same self adhesive sanding material I use for the round barrels. But for octagon barrels I have a 12" long hardwood block I stick the sandpaper to. The paper comes in 2.5" widths, so that's what I cut my block to. I draw file the flats if needed first, and then switch to the block and paper. Start with around 240 grit to smooth the flats, and then switch to around 340-360 grit, whichever is available. I don't go finer than this, as I simply stay with the 360 grit as it wears down, and becomes less aggressive. I used to go down to 400 or higher, but the gunsmith I had rust blue my first barrel told me it was too smooth, and he'd have to scotchbrite the barrel to knock it down, or it wont take the rust bluing. He recommended around 340 grit, so that's what I've done ever since.
Pre WWI Marlins and Singleshot rifles!
http://members.tripod.com/~OregonArmsCollectors/
http://members.tripod.com/~OregonArmsCollectors/
Re: Restoration/Repair/Renewal in Progress -UPDATE 7/16
That is good to know.
D. Brian Casady
Quid Llatine Dictum Sit, Altum Viditur.
Advanced is being able to do the basics while your leg is on fire---Bill Jeans
Don't ever take a fence down until you know why it was put up---Robert Frost
Quid Llatine Dictum Sit, Altum Viditur.
Advanced is being able to do the basics while your leg is on fire---Bill Jeans
Don't ever take a fence down until you know why it was put up---Robert Frost
Re: Restoration/Repair/Renewal in Progress -UPDATE 7/16 UPDATE 7/18
I really like the 'distressed' finish! so is the bore in good shape? if not, I'd send that thing off to JES for a rebore!
Re: Restoration/Repair/Renewal in Progress -UPDATE 7/16 UPDATE 7/18
The rifle is actually new and appears either unfired or shot very little.
There was no rust anyplace in the interior of the rifle.
The bore looks "pristine."
I had to work on the lever latch as it was so stiff it almost required 2 hands to work the lever! I stoned the latch until I got the lever to open nice and smoothly.
It is the Model 336W ... the cheaply finished model that uses a plywood stock and forend.
The gun was not blued. It was finished with Marlin's version of Cerakote. That covered the rough metal finish.
Re: Restoration/Repair/Renewal in Progress -UPDATE 07/23
The 336W will still shoot. The older 336C was finished better. PillHer's is the 336C. It is not exactly as accurate as a modern sniper rifle, but it keeps a 1.5 inch group at 100 yards as many times as you want to shoot it. 30 years ago that was bolt action rifle accuracy for the mid-price range guns.
D. Brian Casady
Quid Llatine Dictum Sit, Altum Viditur.
Advanced is being able to do the basics while your leg is on fire---Bill Jeans
Don't ever take a fence down until you know why it was put up---Robert Frost
Quid Llatine Dictum Sit, Altum Viditur.
Advanced is being able to do the basics while your leg is on fire---Bill Jeans
Don't ever take a fence down until you know why it was put up---Robert Frost
Re: Restoration/Repair/Renewal in Progress -UPDATE 07/23
Looks great! Good job!
-
ollogger

- Advanced Levergunner
- Posts: 2807
- Joined: Mon Jul 05, 2010 2:47 pm
- Location: Wheatland Wyoming
- Contact:
Re: Restoration/Repair/Renewal in Progress -UPDATE 07/23
Awesome job, really like the way it looks!
ollogger
ollogger
-
M. M. Wright
- Advanced Levergunner
- Posts: 4296
- Joined: Wed Sep 15, 2010 12:57 pm
- Location: Vinita, I.T.
Re: Restoration/Repair/Renewal in Progress -UPDATE 07/23
Lookin' good! Waiting on the pictures of the groups you shoot with it.
M. M. Wright, Sheriff, Green county Arkansas (1860)
Currently living my eternal life.
NRA Life
SASS
ITSASS
Currently living my eternal life.
NRA Life
SASS
ITSASS
Re: Restoration/Repair/Renewal in Progress -UPDATE 07/23
Jim I'd say that gun is lucky to have found you.
-
Rube Burrows

- Advanced Levergunner
- Posts: 2096
- Joined: Tue Oct 19, 2010 12:27 pm
- Location: Louisiana
Re: Restoration/Repair/Renewal in Progress -UPDATE 07/24
Looks pretty darn good to me!! Are you going to keep the scope on it? I think that gun with the short barrel would be awesome with a receiver sight, super handy, and would fit with the 'distressed' theme.
Re: Restoration/Repair/Renewal in Progress -UPDATE 07/24
An aperture sight would be more in keeping with the theme. However, if i decide it's gonna be a deer/hog/varmint rifle then I may have it refinished to very fine quality. Who knows, time will tell.
Re: Restoration/Repair/Renewal in Progress -UPDATE 07/24
Looks a WHOLE lot better than when ya started! 
And accurate enough, that's for sure.
I get a kick out fixing up stuff others have thrown away, and
I'm getting the same feeling seeing that rifle.
-Stretch
And accurate enough, that's for sure.
I get a kick out fixing up stuff others have thrown away, and
I'm getting the same feeling seeing that rifle.
-Stretch